If you've run your WordPress site through Google PageSpeed Insights, you've probably seen the recommendation to "serve images in next-gen formats." You install a compression plugin, enable lazy loading, maybe convert a few images to WebP, and the warning persists. What gives?
The problem isn't that image optimization plugins don't work. It's that they only address part of the equation. True WordPress image optimization requires a coordinated approach across multiple layers: how images are sized before upload, how they're compressed on your server, how they're converted to modern formats, and how they're delivered to visitors worldwide. If you're trying to diagnose why your WordPress site is slow and aren't sure whether images are the culprit, our guide to diagnosing slow WordPress sites walks through a systematic approach to identifying your actual bottleneck.
At FatLab, we've optimized image delivery for over a thousand WordPress sites throughout our 14 years in business, from image-heavy design portfolios to high-traffic nonprofit sites. Here's what we've learned about building an image optimization strategy that actually moves the needle on performance. (For a complete overview of our optimization approach, see our guide to WordPress optimization services.)
Why Images Are Usually the Biggest Performance Problem
Images typically account for 50% or more of a webpage's total size. This matters because images directly impact your Largest Contentful Paint (LCP) score, one of Google's Core Web Vitals metrics that influence search rankings.
On mobile devices, the impact is even more pronounced: visitors download the same massive desktop images on screens a fraction of the size. The good news? A properly optimized image can be 60-80% smaller than the original without visible loss of quality. Multiply that across dozens of images per page, and you're looking at dramatic load time improvements.
What "Serve Images in Next-Gen Formats" Actually Means
When PageSpeed Insights tells you to serve images in next-gen formats, it's recommending you move beyond JPEG and PNG to newer formats designed for the web:
WebP compresses images 25-35% smaller than equivalent JPEG or PNG files at the same visual quality. Developed by Google, WebP now enjoys universal browser support: Chrome, Firefox, Safari, and Edge all handle it natively. It's the safe, broadly compatible choice for most sites.
AVIF takes compression even further, often achieving 50% smaller file sizes than JPEG. Browser support is growing rapidly, but isn't universal yet, making it ideal for progressive enhancement rather than a primary format.
By default, WordPress still serves images in their original uploaded format. If you upload a JPEG, WordPress serves a JPEG, even though WebP would be significantly smaller. This is where optimization tools come in: they convert your images to modern formats and serve the right format to each visitor based on their browser's capabilities.
The Image Optimization Stack for WordPress (In Order of Impact)
Effective image optimization for WordPress isn't about finding the right plugin and calling it a day. It's about addressing each layer of the optimization stack, in order of impact.
1. Right-Size Before Upload
This is the single most overlooked optimization opportunity. When someone uploads a 4000×3000 pixel image from their camera and displays it in an 800×600 space on the page, the browser still downloads all 12 million pixels before scaling it down for display.
No amount of compression or format conversion can fix an image that's fundamentally the wrong size. A 4000px image compressed to WebP is still dramatically larger than an 800px image in the same format.
The fix: Resize images to their display dimensions before uploading, or configure WordPress to generate appropriately-sized versions. For hero images displayed at 1920px wide, upload images at 1920px, not 4000px. For thumbnail grids displaying at 400px, those images don't need to be any larger.
2. Compression (Lossy vs. Lossless)
Compression reduces file size by removing data from the image. The question is: which data?
Lossless compression removes only redundant data: metadata, color profiles, and encoding inefficiencies. The visual output is identical to the original. This is appropriate for graphics, logos, screenshots, and any image where precision matters.
Lossy compression removes visual data that's theoretically imperceptible to the human eye. The image looks virtually identical but is significantly smaller. This works well for photographs where small variations in color gradients aren't noticeable.
The right choice depends on the image type and your priorities. For a photography portfolio where image quality is paramount, lossless compression preserves every detail. For a blog post's featured image, lossy compression at 80-85% quality yields significant file size savings with no perceptible difference.
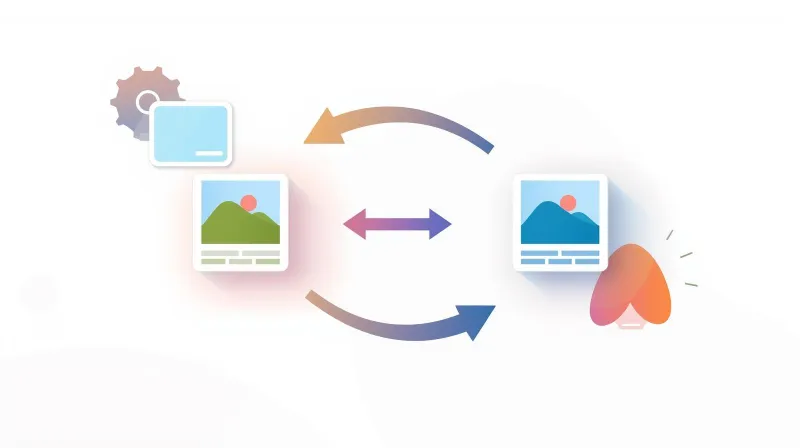
3. Format Conversion (WebP/AVIF)
Converting images to next-gen formats happens in one of two places: on your server (using plugins like Imagify, ShortPixel, or EWWW) or at the CDN edge (using services like Cloudflare Polish). When you convert images to WebP in WordPress, you typically reduce file size by 25-35% compared to JPEG.
Server-side conversion creates WebP or AVIF versions of your images and stores them alongside the originals. When a visitor's browser requests an image, your server (or a plugin) checks browser support and serves the appropriate format. The converted images live on your server permanently. This approach to WordPress image compression gives you granular control over quality settings.
CDN-level conversion happens at the edge, closer to your visitors. Services like Cloudflare Polish automatically create and cache WebP versions of your images without storing them on your origin server. The conversion happens transparently, with no plugin overhead or server processing required.
Both approaches work. CDN-level conversion offers zero server overhead, meaning your hosting resources aren't spent on image conversion. Server-side conversion gives you more control and works even without a CDN with image optimization capabilities. For a deeper look at how different caching layers work together, see our guide to strategic WordPress caching.
4. Responsive Images and Lazy Loading
WordPress automatically generates multiple image sizes and includes srcset attributes to ensure browsers download the appropriate-sized versions. Mobile users get smaller images than desktop users. Verify your theme implements this properly rather than hardcoding sizes or using CSS to scale oversized images.
WordPress lazy loads images by default using the native loading="lazy" attribute, dramatically improving initial load time by deferring off-screen images until needed. But here's the critical mistake to avoid: lazy loading your above-the-fold images.
Your hero image or featured image is likely your LCP element. Lazy loading delays your most important content, hurting your Core Web Vitals rather than helping them. Ensure lazy loading is disabled for images visible without scrolling.
5. CDN Delivery
Serving images from a CDN means visitors download them from geographically close servers rather than your origin server. But modern enterprise CDNs do more than caching:
Cloudflare Polish automatically compresses images and converts them to WebP at the edge, with no server overhead required. Cloudflare Mirage detects device type and network conditions, serving optimized images based on whether visitors are on WiFi or slow cellular connections. Learn more about how these features fit into a comprehensive CDN strategy in our guide to Cloudflare Enterprise CDN with full-page caching.
These edge-level optimizations work transparently without any WordPress configuration changes.
Why Plugin-Only Solutions Often Disappoint
If image optimization were as simple as installing a plugin, everyone's site would be fast. But plugin-only approaches frequently fall short:
Server resource limits: Bulk optimization is CPU-intensive. On shared hosting, it often gets killed before completing. This is one reason why understanding the difference between hosting infrastructure and WordPress optimization matters. Some performance problems require infrastructure solutions, not plugin solutions.
Plugin conflicts: Caching, lazy loading, and image optimization plugins often conflict, leading to broken images or no optimization.
Missing the delivery piece: Even perfectly optimized images served from a slow or distant server won't load quickly.
Configuration complexity: Dozens of settings mean misconfiguration is common, and symptoms (slow sites, broken images) often aren't immediately obvious.
The FatLab Approach: Layered Optimization Based on Client Needs
At FatLab, we don't apply a one-size-fits-all optimization strategy. We start with the highest-performance configuration and adjust based on each client's actual priorities.
The Default: CDN-Level Optimization
Every FatLab hosting client gets Cloudflare Enterprise CDN, which includes Polish (automatic image compression and WebP conversion) and Mirage (mobile-aware image delivery). For most sites, this provides excellent image optimization with zero configuration and no server overhead.
Polish handles compression and format conversion at the edge. When a browser that supports WebP requests an image, Cloudflare automatically serves the WebP version. For browsers without WebP support, it serves an optimized version in the original format. All of this happens transparently.
We can configure Polish for lossless compression (preserving exact image quality) or lossy compression (smaller files with imperceptible quality reduction), depending on the site's needs.
Adding Server-Side Optimization When Needed
For clients prioritizing maximum performance, particularly on sites where Core Web Vitals directly impact business outcomes, we layer server-side optimization with Imagify.
Imagify creates WebP and AVIF versions of images directly on the server, giving us more control over compression settings and format priorities. The server-side WebP images are then delivered through Cloudflare's CDN, combining the benefits of both approaches.
This dual-layer approach is particularly effective for:
- High-traffic sites where every kilobyte matters
- E-commerce sites with thousands of product images
- Sites competing in performance-sensitive search verticals
- Organizations with strict Core Web Vitals requirements
Preserving Quality for Visual-First Sites
Not every site needs aggressive optimization. For design-driven portfolios, architecture firms, and photography showcases, image quality is the product. Compressing a stunning architectural photograph into a blocky WebP defeats the purpose.
For these clients, like the design-focused sites we built in partnership with Gensler, we configure for minimal compression. Polish runs in lossless mode, preserving image fidelity while still stripping unnecessary metadata and enabling CDN delivery. We won't sacrifice visual quality for a marginally better PageSpeed score.
The key is understanding what matters to each client. A nonprofit focused on donations and search visibility has different priorities than a photographer showcasing their portfolio. We configure accordingly.
The Often-Overlooked First Step
Regardless of optimization approach, we always start with the fundamentals: ensuring the site isn't serving dramatically oversized images.
If a theme is loading 4000px images into 400px containers, no amount of compression will fix the underlying problem. We audit image sizes, identify offenders, and either resize the existing library or refactor the theme to request appropriately sized images.
This basic housekeeping often delivers more performance improvement than any plugin configuration change.
Image Optimization and Core Web Vitals
Largest Contentful Paint (LCP) measures when the largest visible element finishes loading, which is usually an image. Optimizing your LCP image (proper sizing, compression, format, delivery) often has more impact than optimizing every other image combined. For a complete guide to diagnosing and fixing all three Core Web Vitals metrics, see our Core Web Vitals WordPress optimization guide.
Cumulative Layout Shift (CLS) measures visual stability. Images without width and height attributes cause layout shifts. Always specify dimensions.
The practical takeaway: identify your LCP element using PageSpeed Insights, then optimize it aggressively. It's usually your hero or featured image.
Common Image Optimization Mistakes

Using PNG for photographs. PNG is great for graphics; terrible for photos. A PNG photograph can be 5-10x larger than a WebP image.
Lazy loading above-the-fold images. Your hero image should load immediately. Lazy loading your LCP element hurts Core Web Vitals.
Missing width/height attributes. Without explicit dimensions, browsers cause layout shifts that hurt CLS scores.
Relying on CSS for sizing. max-width: 100% doesn't reduce file size. The browser still downloads the full-size image.
Ignoring thumbnails. A grid of 50 unoptimized thumbnails adds up quickly. Optimize all image sizes, not just originals.
DIY vs. Managed: When Each Makes Sense
Plugin-based optimization works well when your site has under 1,000 images, you're on quality hosting that doesn't throttle CPU, and you have time to configure and maintain the plugin.
**Managed optimization makes sense when you have a large or constantly growing image library, shared hosting with resource limits, or when Core Web Vitals directly impact your business. For most FatLab clients, infrastructure-level optimization through Cloudflare Enterprise delivers better results with less complexity, since the CDN handles it automatically.
Getting Your Images Optimized
Whether you're handling optimization yourself or working with a managed hosting provider, the principles are the same:
-
Start with properly-sized images. Don't upload 4000px images for 800px display areas.
-
Enable WebP conversion. Either through a plugin like Imagify or through CDN-level conversion like Cloudflare Polish.
-
Configure compression appropriately. Lossy for photos where file size matters; lossless for graphics, logos, and quality-critical imagery.
-
Ensure responsive images work. Verify your theme uses srcset properly and generates multiple sizes for each upload.
-
Don't lazy-load your LCP. Keep above-the-fold images loading immediately; lazy load everything below.
-
Specify dimensions. Every image should have width and height attributes to prevent layout shift.
-
Serve from a CDN. Geographic distribution matters for image delivery speed.
For FatLab hosting clients, most of this is handled automatically through our Cloudflare Enterprise integration. For sites needing maximum performance, we layer in Imagify and configure both systems to work together. Either way, the goal is the same: images that load fast without sacrificing the visual quality that makes your site effective.
Frequently Asked Questions
How do I fix the "serve images in next-gen formats" warning?
Install an image optimization plugin like Imagify that supports WebP/AVIF conversion, enable WebP generation, and configure your server or CDN to serve WebP to supporting browsers with automatic fallback. Or use a CDN with built-in optimization like Cloudflare Polish, which handles format conversion at the edge without plugin overhead.
Will WebP images work in all browsers?
Yes. All major browsers, including Chrome, Firefox, Safari, and Edge, support WebP. Properly configured tools automatically serve WebP to supporting browsers and fall back to JPEG/PNG for older browsers.
What's the difference between lossy and lossless compression?
Lossy compression removes image data to create smaller files with slight (usually imperceptible) quality loss, making it best for photographs. Lossless removes only redundant data, preserving exact quality, making it best for graphics, logos, and screenshots.
Should I delete original images after converting to WebP?
Keep originals. They let you regenerate optimized versions if settings change, re-edit if needed, and provide fallbacks. Storage cost is minimal compared to the flexibility.
Does lazy loading hurt SEO?
No, when implemented correctly. Google renders JavaScript and sees lazy-loaded images. But lazy loading above-the-fold images hurts LCP and Core Web Vitals, which does impact SEO. Solution: immediate loading for critical above-fold images, lazy loading for below-fold images.
Why are my images still slow after installing an optimization plugin?
Check that WebP serving is enabled, that bulk optimization has finished, and that no conflicting plugins exist, and consider CDN delivery for geographic distribution. Configuration issues are the most common culprit.
Need help optimizing your WordPress site's images? FatLab's managed WordPress hosting includes Cloudflare Enterprise CDN with automatic image optimization, plus access to our team of WordPress consultants who can configure the optimal setup for your specific needs. Learn more about our optimization services or view our hosting plans.